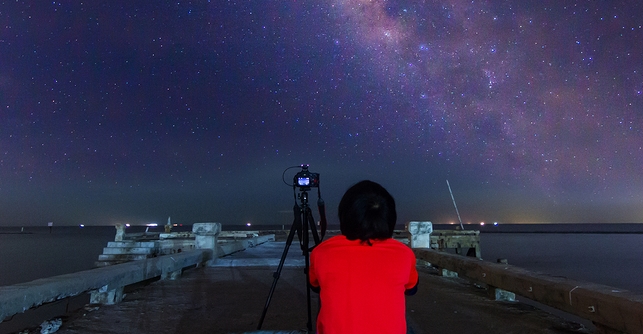
Many photographers seem to think light painting is all about creating an image with all those bright, cool-looking shapes and text.
I admit, they look awesome but it’s not all you can do with this technique. If you’re not into the flashy type of effects, you can use light painting to enhance details in your image in a very subtle way. Rusty Parkhurst from Improve Photography has some great tips on how to make it happen.
WHAT GEAR DO YOU NEED?
You probably already have what you need to get started with light painting. It doesn’t have to be high-end top-of-the-line gear, either. What you do have will most likely work, and you can always upgrade later if you want.
It can be a DSLR or mirrorless camera body. Some point-and-shoot cameras might even work. Any camera will work, as long as you are able to manually control the exposure settings. However, it should be noted that some cameras are better able to handle noise than others. When doing this type of photography, the shutter is open for up to 30 seconds or longer. Long exposures tend to cause a camera’s sensor to heat up. When that happens, your image can begin to have more noise, or graininess, especially in the shadow areas.
The same is true for lenses. If all you have is the kit lens that came with your camera body, don’t worry about it. You might be surprised by the images you can create even with the least expensive lenses. Ideally, if you are shooting a landscape or the night sky, you will want a wide angle lens. But once again, experiment with what you have and work at different focal lengths to see what works best for your situation.
You could set up your camera on a solid stationary object, but that will really limit your compositions. A tripod will be much easier to use and is way more versatile. If you don’t have one, start saving your pennies. And whatever you do, don’t opt for the cheapest tripod you can find at Walmart or Best Buy. The price may look good, but the tripod will be flimsy and you will not be happy with it for long. Spend a little more and get something that is going to be easier to use and be much more durable.
Finally, you will need some kind of external light source. The light will be the paint brush you use to create the image that you envision. The options are seemingly endless here, but sometimes the ‘less is more’ approach is best. If it is really dark, then only a small amount of light can make a big difference. This could be a small flashlight, pen light, an off-camera flash on a low power setting, or even a cell phone. On the other hand, if the subject you are lighting is a long ways from the camera, you may need to use a large spotlight to provide enough illumination.
While we are on the subject of lights, don’t forget a headlamp. Since it will probably be dark, you will need something to light your way. A headlamp gives you light to help with setup, helps you to see the camera to change settings, and also keeps your hands free.
CAMERA SETTINGS
Camera settings will vary quite a bit, depending on the scene and the image you are trying to make. Generally speaking, though, you will need to keep the shutter open long enough to give yourself enough time to paint light into the scene. Since these will be long exposure images, you will need to have your camera locked down on a tripod. Start out by switching your camera into manual mode. That will allow you to set the shutter speed, aperture, and ISO independently of one another to get the desired result. You will then want to focus on the element in the scene that will be light painted. That can be difficult since the object is in the dark. To get focus, use a light to illuminate the object and focus on it using the camera’s autofocus. After getting focus, switch off the autofocus function on the lens and/or camera so it will not be trying to change focus each time you press the shutter button.
LIGHT PAINTING TECHNIQUE
Once you have a good base exposure for your scene, you can start adding light. Start out with just a little bit of light on a single object in the foreground, just to see how it looks. Depending on how dark it is, you may need only a very small amount of light to make a big difference in the appearance of the image. The key is to light the scene selectively, to add depth and dimension. If you overdo it and light up the entire scene, it will become more flat and uninteresting. With that in mind, focus the light source on small areas at a time. Keep in mind that the longer the light is focused on a particularly area, the brighter that area will be in the image. So, vary the amount of time you shine the light on each area to add even more depth.
You may even want to use more than one light source for an image. For small details, use a smaller light, and then use a larger light for the larger elements in the scene.
Read the full article with more tips over at Improve Photography.
Source: Improve Photography

