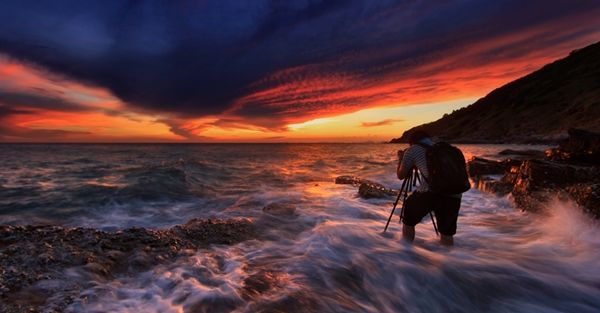
Adjusting shutter speed is an easy way of adding special effects to your photos.
This article over at Digital Photography School will show you 3 different ways of how to do it. All of these will work great when you want to add a little motion to a picture that might otherwise seem a little boring.
PANNING
Panning is a technique for photographing moving subjects which allows you to get the subject relatively sharp, and blur the background. This adds a sense of speed and works particularly well when you have a background that is unattractive or distracting. The basics behind panning is you choose a slow shutter speed, and move your camera to follow the subject. Here are some tips on setting your camera for panning and giving it a try.
- use high speed or “burst” shooting mode to take multiple images while holding down the shutter button
- select Shutter Priority on your mode dial
- start with 1/30th of a second and adjust slower and faster as necessary
- practice following the moving object after it passes by
- just like in golf, follow through is the key. Point your camera towards the approaching subject, shoot and follow them as they move through your field of view, and keep following their motion even after you stop shooting.
LONG EXPOSURES
By long exposures I’m taking about a shutter speed slower than you would usually be able to hand hold the camera. There are many reasons to use long exposures including: moving water, capturing star trails at night, car headlights moving through your scene, and night photography in general. You will need a sturdy tripod, a remote trigger to fire your camera and time. I say time for two reasons: one you will have to wait for some really long exposures sometimes, especially star trails; and two because you will need time to shoot, adjust and correct. A lot of photography is trial and error and in this age of digital photography we have the huge benefit of being able to have instant feedback so we can correct or adjust in the field and continue shooting.
ZOOMING IN OR OUT DURING EXPOSURE
- Zoom in first to focus and lock it there so it doesn’t shift when you press the shutter button. You can use focus lock (a bit cumbersome), use autofocus and then turn it off, or use your camera’s back button focus capability. Whichever you choose just make sure you’ve focused with the lens at the longest focal length where it’s more critical than a wide one
- Practice rotating the zoom mechanism on your lens. Get comfortable with which way to turn it, and how to turn it smoothly without making a bumpy mess.
- Use an exposure of one second or longer. It’s pretty hard to do this a a/100th of a second!
- Experiment with different zoom speeds (how fast you rotate the lens) and timing. The image will look different if you pause at the beginning and then zoom quickly, versus zoom slowly at the beginning and pause at the end of the exposure.

