
Professional photographer Nasim Mansurov is giving us a lot of examples of what might be causing blurry images when you’re shooting with your camera mounted on a tripod.
Surprisingly, some of the common methods to reduce camera shake will, in fact, do just the opposite. Let’s take remote shutter release, for example. Wouldn’t you think that would take away even the slightest possibility of camera movement?
Is Remote Shutter Release Helpful in Reducing Camera Shake?
Having been teaching workshops for a number of years, I notice a pattern in the way that remote shutter releases are typically used. Many photographers start out with flimsy tripods, tripod heads and quick release plates that severely destabilize their setup, resulting in a lot of blurry images when photographing in low-light conditions. As a result, many think that buying a remote shutter release will somehow alleviate the problem and yield sharper images. In reality, remote shutter releases in such cases only end up making the problem worse. First, they do nothing to address the initial problem with stabilization. Second, they sometimes end up consuming precious time in the field to set up and get going (if you have tried to screw in a remote shutter release cable on a high-end DSLR in below freezing temperatures, you know exactly what I mean). Third, if it is a cabled shutter release, it is yet another device dangling off your camera, which can create more stabilization problems in windy conditions. Fourth, those pins on the camera do tend to bend and break off overtime, resulting in expensive repairs and lost time in the field. And lastly, remote shutter releases are prone to break and get lost when traveling. For these and other reasons, I have personally been minizing my use of the remote shutter release – I only pull it out when I absolutely need it.
Camera Strap
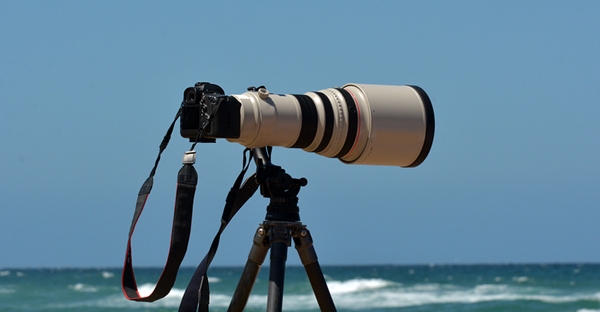
While camera straps can be really nice to have when hand-holding your camera, they become a hassle once you mount your camera on a tripod, especially when shooting in windy conditions. When wind starts to blow hard, your camera strap might start to hit your camera or your tripod feet, causing your setup to destabilize, resulting in blurry images. For this reason, it is best to either use camera straps that can be easily removed through a quick-release mechanism (without leaving dangling ears), use one hand grips that do not react to wind, or not use camera straps at all. Some sling camera straps can have tripod mounts on them, allowing for quick tripod mounting and removal of the strap and those could be quite handy to use as well.
Image Stabilization
While some cameras have ways to detect tripod use, it is best to always disengage image stabilization when you shoot off a tripod. When your setup and the platform you are standing on is stable, image stabilization can be quite harmful to your images. So if you have an image stabilization switch on your lens, make sure to move it to “Off” position when shooting.
If you have a camera with in-body image stabilization (IBIS), make sure to turn it off from the camera menu. Image stabilization can be named different things depending on brand. On Nikon lenses it is called “Vibration Reduction”. On others it might be called “Vibration Compensation”, “Optical Image Stabilization” or “SteadyShot”, For example, if you shoot with a Sony mirorrless camera that has IBIS, you will have an option for “SteadyShot” in the camera menu – make sure to set it to “Off” before shooting.
There are rare conditions in which you might need to keep image stabilization turned on. For example, image stabilization on some of the Nikon super telephoto lenses is designed to be used on a tripod. Other times, image stabilization on a tripod can be helpful when shooting from a non-stable platform, such as a boat. Refer to your camera and lens manuals to see in which situations image stabilization should and should not be engaged.
DSLR Mirror Slap
If you use a DSLR camera, the mirror slap can be a source of camera shake when shooting in low-light situations. Gladly, many modern DSLRs have ways to prevent mirror slap from causing camera shake. One of such methods is to use the Mirror Up mode. In this mode, releasing the camera shutter will first raise the mirror, then the second release will start the exposure. While the Mirror Up mode can work great to eliminate mirror slap, it pretty much requires the use of a remote shutter release. Sadly, most Mirror Up implementations do not work with a self-timer, which makes this mode only practical to use with a remote shutter release.
Another method, which I personally prefer and use probably 90% of the time, is Exposure Delay Mode. With the Exposure Delay Mode turned on, the camera will raise the mirror, wait for a specified amount of time, and only then take a picture, which can effectively reduce and potentially even eliminate mirror slap. This mode is not available on every camera, but if it is available on yours, you can use it in combination with a self-timer, which can work out really well (more on that below) in situations where you do not have a remote shutter release with you, or do not have the time to set it up.
Shutter Shock
It turns out that another big source of camera shake can actually be the shutter mechanism, which some people refer to as “shutter shock”. While most DSLRs have ways to deal with Mirror Slap, few cameras actually provide a way to deal with the shutter shock. Shutter shock is a real problem and not just in DSLR cameras – it can actually be a pain to deal with even on mirrorless cameras! The problem with shutter shock, is that the shutter moves right before the exposure starts, so it can be more of a cause for blurry images than the mirror mechanism.
The best way to deal with vibrations from the shutter mechanism is to use a feature called “Electronic Front Curtain Shutter”, “Electronic First Curtain” or “Live View Silent Mode”. Sadly, most entry-level and mid-level cameras on the market today do not have such mode available, which is disappointing.
If you do have the Electronic Front Curtain Shutter (EFCS) mode available in your camera, then with a combination of camera features, you can completely eliminate any camera-induced vibrations. Basically, when EFCS is engaged, the camera does not trigger the shutter mechanism at the start of the exposure – the shutter is already open and the camera only engages the shutter at the very end of exposure.
Long Focal Length
If you have ever shot at a very long focal length, especially when coupling super telephoto lenses with teleconverters, you might have noticed that your camera will shake like crazy and continue to do so for a while after you touch it. This is especially noticeable when shooting from an unstable tripod setup. The reason why longer focal lengths are challenging, is because vibration is much more pronounced at longer focal lengths than shorter ones, since you are magnifying such a tiny portion of the frame.
Surrounding Environment
Once you take care of all tripod, lens and camera-induced stabilization issues, it is also important to check if your environment might be causing camera shake. For example, it is expected that if you shoot in very windy conditions, your camera might shake as a result of strong wind gusts. If you shoot with your tripod dipped into the sea / ocean, the waves might be hitting your tripod legs and causing camera shake.
Read the full article with even more great tips over at Photography Life.
Source: Photography Life
Good tips and info