
Photo artist Jesse Thornton has put together a great article on night photography over at PetaPixel.
Jesse uses light painting to give the foreground more detail and make the image more interesting to viewers. This is such a simple technique that can turn your night photography from good to great, and all you need is a flashlight (or whatever light source you can think of). Basically, a key chain LED light will do the job just fine.
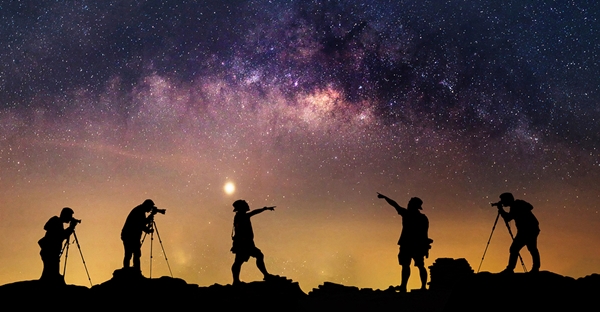
Painting with Light
To understand how a camera collects light data, it might be easy to draw a comparison to a painter painting on a blank canvas. Areas on the painter’s canvas will appear lighter with lightly applied brush strokes. Apply more paint to the same area and it becomes darker and more defined by that color.
What we see as light are actually particles called photons that exist on the visible plane of the electromagnetic spectrum. Think of the camera sensor as being a canvas and photons the paint. When photographing stars and the dimly lit night sky, the aperture is set wide, ISO sensitivity is high and the shutter is usually left open for 15-20 seconds at a time in order to allow as many photons as possible to collect on the camera sensor and give us a complete picture at the end of the exposure.
A 5 second exposure will appear twice as dark as a 10 second exposure at night because there is half as much light collecting on our canvas. A dark foreground will remain silhouetted at any of these shutter speeds because there are many times less photons that are being reflected off these objects than there is being emitted from the night sky. There are exceptions where a highly reflective surface like concrete, limestone or sand may reflect enough light to be seen in camera with one exposure at these settings.
Due to the sensitive camera settings that are required to shoot the stars, it’s important to be sure our light source is not very powerful or we risk saturating the camera sensor with light and blowing out the highlights or making the foreground lighting too dominant in the scene.
For this task, I simply use low output LED flashlights or an LED panel. LED flashlights are better suited than traditional incandescent bulb lights because they put out an even beam of light, especially if there’s a floodlight mode. The small and cheap LED key chain lights work well because they are easy to control and can be turned on/off with a simple button click, or a headlamp with a dimmer switch. I will also use an LED panel with adjustable brightness for constant, controlled lighting and these are well suited to light the inside of structures, creating silhouetted subjects, or to provide steady lighting for time lapse. You can mount these on any tripod too, which helps.
To paint, you will quickly flash the light over the subject you want to light during the exposure, making sure to smoothly pan the light evenly over the foreground. Just as with accumulating layers of paint, leaving the flashlight in one spot for too long will result in brighter areas. Getting the right amount of light will take trial and error and I like to shine the light from an indirect angle to create shadows and texture. Sometimes it can be helpful to “dampen” the light by placing a light cloth or plastic bag over the flashlight.
Ambient Light Sources
Street lights can be annoyances when it comes to night photography, but sometimes you can use them to your advantage.
Moonlight and twilight can be used as lighting sources as well. These can be done with single exposures and careful planning but combining exposures taken at different times from the same spot is the most versatile way to go.
Finally, you can use ambient star light to light the foreground and this will create the most natural look. Very long exposures in bulb mode are required, however, as is multiple exposures and stacking. This works especially well in rocky areas where light is more readily reflected.
Read the full article with even more tips and example images over at PetaPixel.
Source: PetaPixel