
Whenever there’s a chance to learn more about getting photos right in camera, I’ll take it.
I know a lot of photographers who are extremely talented in using photo editing tools, and I have nothing against post processing.
In fact, some of these photographers are so good with Photoshop that they take photography to a whole new level of art.
But if you’d like to shoot more and edit less, here are some great tips from Karthika Gupta over at Digital Photography School, to help you get your images right in camera.
Pre-visualize the shot you want to achieve
Do you want an image that is light and bright? Then plan on shooting during the day in a wide open space with lots of sunlight. Do you want to create an image that is dark and moody? Then look for locations that are not in direct sunlight, ones that have texture and tones that are on the darker side.
Resist the temptation to arrive at a location and immediately start clicking the shutter just because you want to take a picture of something. This does take some discipline but it can save you a lot of time and effort in the long run. Not to mention the hassle of storing images that really don’t convey a story and are really random in nature.
Limit yourself to a select number of frames
This is a concept that transfers over from film days and I strongly encourage you to go out and shoot a roll or two of film (even a small disposable point and shoot camera). Challenge yourself to really tell a story in a limited amount of frames (typically 24 to 36 for 35mm cameras and even less for medium format cameras). You will immediately feel restricted and limit yourself to only shooting that which is interesting. And you will find yourself paying more attention to composition, lighting ,and technique when you limit yourself to a small number of frames like 16, 24 or 36.
Go into Single Shot drive mode on your camera
If your DSLR has a burst mode capability, deactivate that functionality or change it to Single Shot. When you press the shutter, only one shot will be taken. The ability to hold down the shutter and fire away 5-6 frames is deactivated. Again this will help you focus on technique.
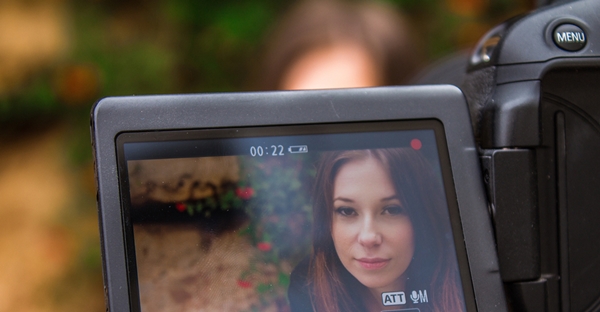
Use the preview function (LCD screen)
If your camera has a preview function (also known as the playback function), use that to view and analyze the image you have just taken. Is it sharp and in focus? is the properly litm, or is it too dark? If the composition is incorrect, the image is blurry, or the exposure is completely off, you can fix the problem, delete the image and retake the shot. The more you practice fixing the image right then and there, the fewer bad images you will take back with you to try and edit and salvage later in post-processing.
Use the histogram
Make sure you practice the art of reading and reviewing the histogram when you are shooting just for yourself or during test shoots, not during paid client gigs. On a client shoot, if you are messing with histograms and excessive review of the LCD, you may appear very unprofessional to your clients. They may perceive it as you don’t know what you are doing and that you lack confidence in your technical abilities. The good news is that by practicing enough on your own time, you will be confident to nail the shot right on the first go!
Read the full article with even more tips over at Digital Photography School.
Source: Digital Photography School