
One of the most important things I’ve learned personally is that a good portrait photographer pays as much attention to the shadows as they do to the perfect light.
It’s not always easy to remember all of these things at once, but if you focus on one thing at a time and remind yourself to make sure you get that one right in all of your portraits, they will soon become easier.
FIND THE EDGE OF THE SHADE
If you’re shooting portraits during the harsh midday sun, finding some shade is often the go-to technique. But you don’t need to walk a mile deep into the forest to find good shade. Instead, find the edge of the shade, just beyond the sunlight. You can use the landscape that’s still lit by the sun as a natural reflector. That means that you’ll need to stand in the sun while your subject is in the shade. You’ll have to play with how far into the shade your subject will need to stand. Too close to the edge and your subject will probably still be squinting. A few feet back into the shade will allow you to balance using the aforementioned natural reflector with the more even, soft light you’ll get in the shade.
FIND A NATURAL REFLECTOR
I mentioned a natural reflector in #21, but that scenario isn’t the only way to use your surroundings as a reflector. Any light-colored surface can act as a reflector–a wall, a beach, a window, a car, anything that’s bouncing light. You don’t even need to use the surface as your main light; in fact, I’ll often use a natural reflector to balance out shadows that might be getting too dark for my tastes.
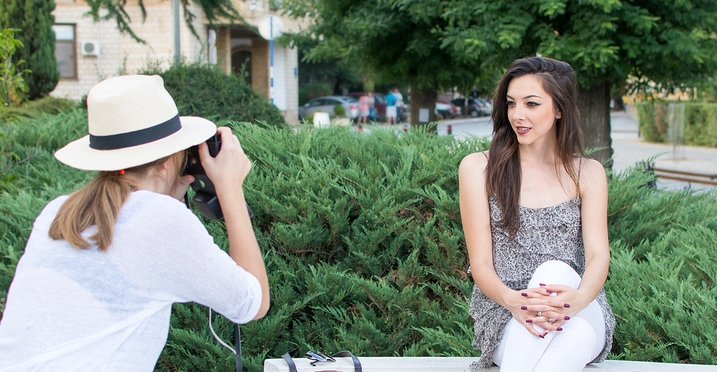
MAKE YOUR SUBJECT THE BRIGHTEST PART OF PHOTO
To draw your viewer’s eye to your subject, make your subject the brightest part of your photo. I’m always on the lookout for backgrounds that are darker than my subject. You don’t need to shoot all of your portraits in a cave, but pay attention to walls, banks of bushes, and the like that are darker than your subject. If you’re following the advice in #22 (put your subject’s back to the sun), it can be tough to make your subject brighter than the sky. If you pay close enough attention to your surroundings, you can accomplish both at once.
FOCUS ON YOUR SUBJECT’S CLOSEST EYE
The eyes are the most important part of a portrait. The subject’s eyes should be the sharpest part of the photograph. That means you need to put your selected focus point right on the subject’s eye. And if they’re not perfectly perpendicular to the camera, then focus on the eye that’s closest to the camera. If you don’t like the look of one eye in focus and the other slightly out of focus, either turn your subject or narrow your aperture a bit more.
STOP WORRYING ABOUT ISO
To bring more light into your camera because you’re following tip #31, increase your ISO. Some photographers have a fear of high ISO settings. They don’t want too much digital noise in their photos. But our cameras are sophisticated pieces of technology. They can handle more than we give them credit for. More importantly, photographers are really the only people who care about digital noise. Clients and subjects don’t notice noise nearly as much as they notice themselves. If you’ve never increased your ISO beyond 400, do it. Live a little. At a wedding a few weeks ago, I shot at ISO 1250 as we photographed the bride getting ready. After sunset, I was asked to do an impromptu photo of the grandparents. It was basically dark out, so I had to push to ISO 5000. And I didn’t hesitate to do it. Capturing that moment with those family members was much more important than a little noise in the photo.
SHOOT FROM DIFFERENT ANGLES
A step or two to the right or left can completely change a photo. You might think that you have the perfect perspective until you find that a better perspective is three feet to the right. You can really change your photo by moving even a small amount. Shooting from several angles will also give you different photos with the same pose. You can also discover which side is your subject’s best side by shooting from multiple angles. Remember, this isn’t just for the sake of variety; shoot different angles to find the best perspective.
SEPARATE YOUR SUBJECT FROM THE BACKGROUND
All too often I tell a client that I’d like to use the trees as a backdrop only to see them quickly back themselves up and touch the trees with their backs. That’s not what I want at all! While I want the trees in the background, I want my subjects in the midground so that the trees blur out a bit. The easiest way to draw more attention to your subject compared to the background is by physically separating them from the background. Subjects find comfort when there’s something tangible nearby. Maybe they’d like to lean on something or just not feel like they’re standing in the middle of nothing. But that small sense of discomfort makes for a better portrait. Separate your subject from the background.
GET THE REFLECTOR CLOSER
If you’re using a reflector to fill shadows or light your subject, keep the reflector close. If your reflector is far away, then you’re making your reflected light source smaller, which creates faster fall-off and harsher light. Get your reflector as close as possible to keep the reflected light soft and wrapping.
BE CAREFUL OF AN EXTREME VIGNETTE
Adding a vignette around your photo is a great way to draw your viewer’s eye to the subject. But you must vignette in moderation. Do a squint test after you add a vignette. If you can clearly see a black or white vignette even when you squint, then you’ve gone too far. If you can clearly see your black or white vignette with your eyes wide open, then you’ve definitely gone too far. Also, I’ve never done a white vignette. Our eyes are drawn to what’s brightest in the photo. A white vignette will draw your viewer’s eye to the edges. Use a dark vignette, and use it in moderation.
MAKE SURE NOTHING IS STICKING OUT OF A HEAD
My family and I love to have things stick out of our heads when we video chat. A favorite of ours is to turn on a fan and put that spinning fan right on the top of our head. When we photograph each other, we sometimes have trees or signs or animals sticking out of our heads, too. Silly business, right? While I might have fun doing this with my family, I make a point to avoid it entirely with clients. Even if you’re shooting at a shallow depth of field, a blurred out fence post or tree can still clearly stick out of someone’s head. Just like the advice in #46, look beyond your subject and make sure nothing is awkwardly sticking out of them.
WHAT’S BIGGEST ON THE BODY?
In tip #27, I told you to shoot from slightly above so that your subject’s head would be closest to the camera. I mentioned that whatever is closest to the camera will appear larger in the frame. Be aware of this as you pose your subject, especially groups of people. Elbows, feet, and hands can quickly creep closer to the camera, making those body parts look bigger than they should and taking attention away from your subject’s face. Look at what’s closest to the camera; it’ll be biggest in the frame. Chances are, you’ll want the subject’s face to be biggest, or at least not outshined by a foot or hand.
YOU NEED SHADOW
While much of this list is about the light in your photo, don’t forget that you also need shadow. Shadow gives dimension and shape to your subject. Without shadow, your subject will be flat and uninteresting. The amount of shadow you include is up to you and might depend on your subject. Just don’t get rid of shadow entirely. Shadows can do as much, if not more, for your photos than light can.
Read the full article with even more tips over at Improve Photography.
Source: Improve Photography