

There are 26 tips altogether here to help you take better photos
Not every single one is a winner but each one is so short I’m pretty sure you’ll find yourself finishing this article just the same way that I did.
So without further ado let’s get started with the letter…
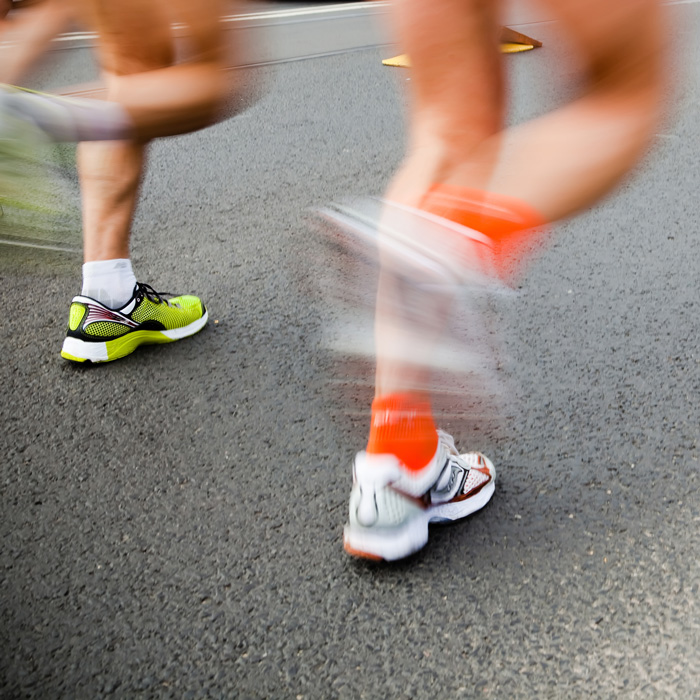
A is for Action
Want to enliven your action shots? Blur is the key. For simple blur: Drop the shutter speed one or two notches below action-freezing speed to blur the hands and feet of runners, the spokes and pedals of bicycles, etc. Add flash for ghosting: With flash on relatively close subjects, you can lower the shutter speed even further. Use second-curtain sync to get a ghost trail behind the subject. Pan with the motion: Use very slow shutter speeds to blur the background into a streak.
B is for Boat
Nature photographers Jason Hahn and Jon Cornforth (who shot the photo above) offer advice for keeping steady as she goes. Activate image stabilization: A first line of defense against wave-induced shake. (Nikon users: In very rough water, engage the Active setting on your VR lenses.) Set higher ISOs for fast shutter speeds—better a bit of noise than blurry shots. Roll with the waves: If you try to counteract the boat’s motion with your body, you’ll be less steady. Stay seated when possible. Use support: A monopod with a flat swivel foot is usually the best bet. Tripods can be cumbersome, especially in small boats.
C is for Camera Presets
Use custom settings for the types of shooting you do. Make the default settings (the ones that come up when the camera is turned on) those you use when shooting in a hurry. And fine-tune individual settings: Adjust a custom white balance to match the bulbs in your living room, for example.
D is for Diopter
If the view through your viewfinder is always blurry, check the diopter adjustment. Leave your lens cap on, turn on the camera, and adjust the diopter until the info display in the finder is as sharp as it can be.
E is for Exposure
The black cat on the black sofa. The kid in a white parka on a snow bank. These kinds of scenes fool through-the-lens meters into making these scenes gray. Fix 1, squash the histogram: Enable the histogram display on your DSLR, and use whatever meter and exposure mode you usually do to make a reading and/or exposure. Now set exposure compensation so that the histogram’s pixel pile gets shoved hard one way or the other: negative compensation to shove it to the left for dark scenes, positive compensation to shove it to the right for light scenes. Yes, you want clipping at the edge. Fix 2, ditch the camera meter: Use a handheld incident exposure meter to measure the light falling on the scene rather than reflected from it. In either case, shoot in RAW for extra leeway.
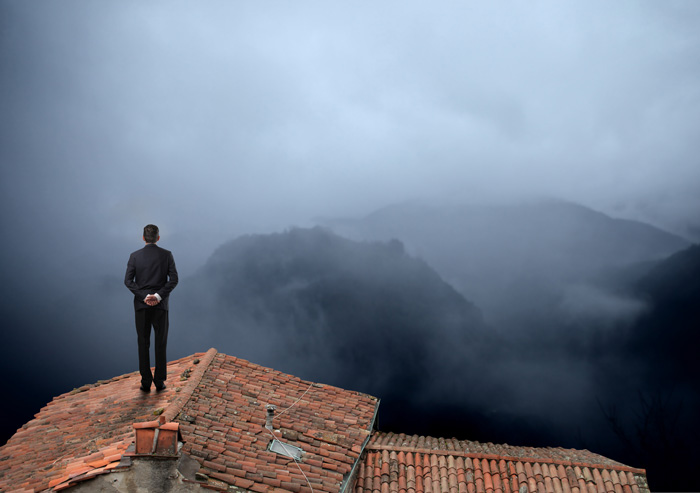
F is for Fog
Next time you’re literally in a fog, grab a camera and start shooting. Make flattering portraits: Fog can erase wrinkles, as well as wash out cluttered backgrounds. In really dense fog, use it for high-key portraiture—dress your subject in white and bump up the exposure. Add depth: Moderate fog can suggest depth in land- and streetscapes. Compose so that you have foreground elements close enough so that they are almost sharp, with background elements blurring out. Use it as a scrim: In the shot above, the photographer aimed a remote flash at the backs of the couple, letting the fog diffuse the beam.
G is for Gel
Even shooting RAW, you can run into white balance issues when foreground color temperatures are radically different than those of the background. There is an easy, cheap fix. Green-gel it: If you’re shooting with on-camera flash in fluorescent ambient light, pop a green gel over the flash, and set the camera white balance for fluorescent. Amber-gel it: Same situation, except tungsten ambient light? Use an amber gel on the flash and tungsten WB on the camera. Visit stickyfilters.com for a nice selection of gels.
H is for Hold Steady
In holding a DSLR, the left hand provides primary support; the right hand operates the controls. With a short lens, rest the camera on the base of your left hand; with a long lens, rest the lens on your hand so that focus and zoom rings are within reach of your fingers. Brace your left elbow against your body for stability.
I is for Image Stabilization
Maintain a half-press on the shutter button to activate stabiliza-tion, which needs a moment to settle down. Concentrate on keeping your eye on the subject. Check tripod compati-bility: With some lenses, you should keep IS on.
J is for JPEG
Yes, we recommend shooting RAW for maximum image control, but sometimes JPEGs rule. Stick with them when you want to… Shoot fast action: Many cameras reach their maximum burst rate only in JPEG mode, and can take far more shots in a burst than with RAW. Conserve memory cards: RAW files can take up to 3 to 5 times more bytes than a JPEG of the same image. Ignore the computer: If you’re uploading without editing via a camera’s Wi-Fi connection, unprocessed RAW files can look flat, while JPEGs don’t need to be converted, and upload much quicker. Not overdo quality: For a product shot for eBay, or a photo for a fishing license, RAW is overkill. Make a panorama or composite: Combining multiple photos is a serious workout for your computer; using smaller JPEGs can save you a lot of time in editing.
K is for Kit Lens
Kit lenses (typically 18–55mm in APS-C, 14–42mm in Four Thirds) perform really well for the price, but they do have drawbacks, notably slow speed. Here’s how to get the most out of them. Look sharp: Our tests show the sharpest apertures are f/5.6 at wide angle, f/8 at mid focal length, and f/8–11 at tele. Don’t neglect the mid focal lengths: With an APS-C lens, 35mm gives a normal perspective, and 50mm a very nice portrait tele view. Distortion is lowest at these settings, too. Get better bokeh: Depth of field decreases with magnification, so step closer, zoom farther, and get your subject as far from the background as you can. Move to put a plain background behind your subject.
You can see letters L through Z on the original article over at Popular Photography
Source: Popular Photography