
One thing you will need to bear in mind is light pollution.
You need to find a place away from the city lights as too much light will pollute your image and ruin your photos. The moon can have the same effect of ruining your image so you’re looking for a moonless night.
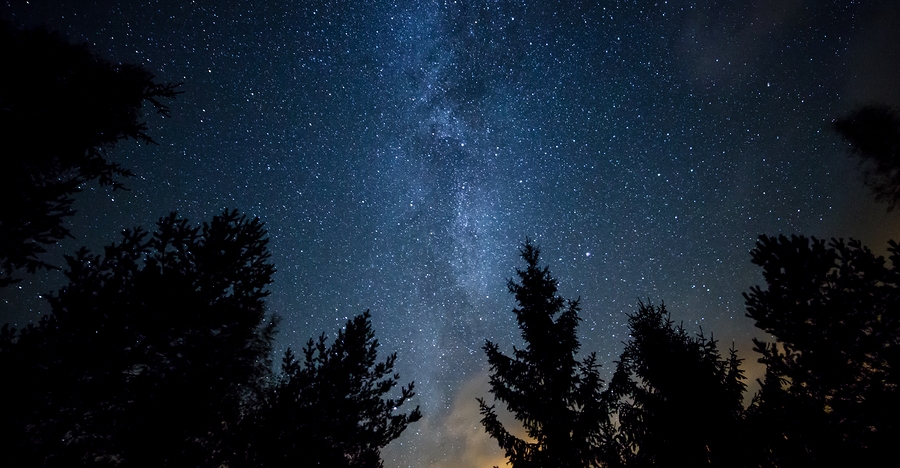
You can Google your surroundings for away from the city spots (Dark Sky) and moon phases at night. You should know beforehand in what direction, and at what time the moon is going to rise. That will help you a lot with composition of your images. A moonless night is always best to shoot stars.
Additionally, you can also use a compass app on your smartphone (for Android here) to locate the north star for star trails and you can also download an app called Star Chart (for iOS or for Android) or Google Sky just to give you an idea of which stars there are above you. Both of these apps also show you the direction of the Milky Way so you can directly shoot it and get amazing results.
Camera settings
Now let’s get to the important part, camera settings. You will need to take control of your camera, keeping it in Manual mode. Change the mode to Manual and tune in the following settings.
Focal length: Set your focal length to the widest you have – e.g., 18 mm in the case of a kit lens. You can choose any focal length you want, but the more you zoom in (the longer the focal length is), the less stars you will be able to capture, and your optimum exposure time before star trails start to develop will also decrease (500 Rule).
Aperture: Setting your aperture to the widest option is key here – e.g., f/3.5 as in a kit lens. By using the widest the aperture, more light will enter through your lens giving you brighter stars and Milky Way.
Shutter speed: If you are only shooting stars and/or the Milky Way, set the shutter speed to 20 seconds or star trails will start to appear, giving the look of larger, unfocused stars. If you are wondering, why 20 seconds, here is the answer. Optimum exposure before you start getting star trails is calculated by dividing 500 by your focal length (also divide the answer by 1.5 if you are using cropped sensor.) So in the example of an 18mm lens on a cropped sensor – 500 divided by 18 = 27.78 divided by 1.5 = 18.52 (so roughly 20 seconds).
You can finish the rest of this article over at Digital Photography School
Source: Digital Photography School
Cameron Monk
Ryan West
Andrew Carbajal Johnny Yu
Carl Buck
Cassidy Sensow
Good article, I will definitely give these pointers a try.