
If you have Lightroom you can use these simple steps to post process difficult landscapes with ease. High contrast landscapes are notoriously hard to process. Most people resort to exposure bracketing and HDR. The problem with that is when you convert any image to HDR many times it takes away some of the true reality or realism of the image. I especially have trouble with high contrast landscapes since I live in California and there’s always a high contrast when taking landscapes at the beach. In this tutorial professional landscape photographer Michael Frye takes us through his steps in light room to process a classic Yosemite image.
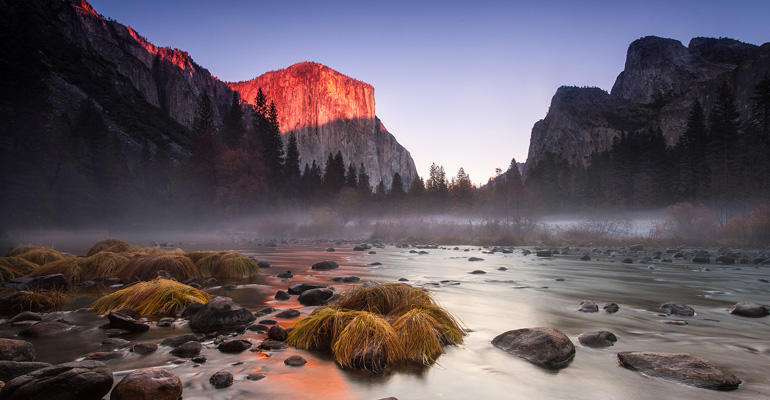
An early November snowstorm dropped five inches of snow on Yosemite Valley, coating colorful autumn trees with white. The skies started to clear just after sunrise, so I headed to a familiar spot along the banks of the Merced River with a great view of El Capitan. I kept switching from vertical to horizontal framing, and from tighter to wider views as the light and clouds shifted. This is one of the wider vertical images, with a great combination of sunlight and clouds.
I want the final photograph to convey the drama and majesty of this classic Yosemite scene. That will require darkening the top half of the image, where some of the sunlit areas are on the verge of being washed out, and lightening the murky reflection. But although I want to compress the overall tonality, I don’t want to flatten the image too much. It needs to have local contrast within the top half of the frame as well as the bottom half. Luckily, the Highlights and Shadows tools in Lightroom’s 2012 process do a wonderful job of balancing high-contrast scenes without flattening local contrast.
Is Exposure Blending Necessary?
While photographing this scene, I bracketed exposures just in case I needed to blend two or more frames together later. Is that necessary here? I don’t think so. This is the middle exposure of my bracketing sequence, and though it looks contrasty, the histogram indicates that there’s detail in both highlights and shadows, with nothing pushed up against either edge.
To see the tutorial with accompanying screenshots head over to Outdoor Photographer
Source: Outdoor Photographer
Image Source:Boqiang Liao