
I think this article is a pretty good jump start into some very common things new photographers will want to learn starting out.
I was recently watching a video interview with wedding photographer Roberto Valenzuela. In that video he was talking about learning photography through deliberate practice. Think about it football players practice all week to play on the weekends. So as a photographer when we go out to shoot how can we see that as practice? When you’re shooting you’re in the game.
I recommend taking these tips below then spending an hour just out practicing them. If you do you’ll go into your next shoot far better prepared and ready to take advantage of all the new things you’ve just learned and practiced.
1. Get subjects sharp
In most situations you’ll find that your camera’s autofocus system is fast and accurate so you can rely on it to get the subject sharp.
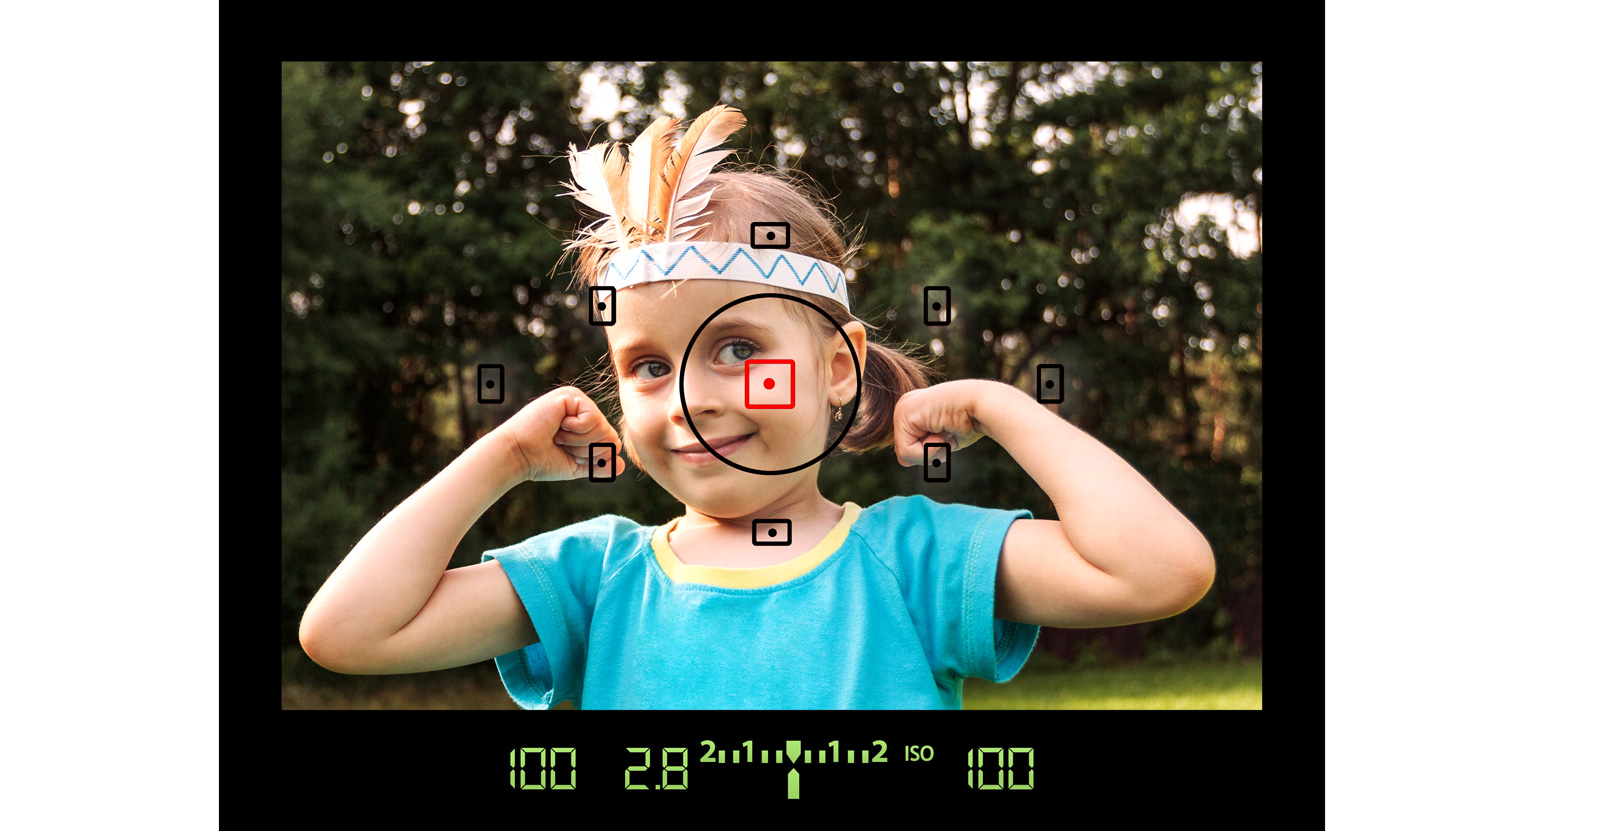
However, you can increase your chances of getting the result you want by giving it a helping hand. In the default set-up your camera will try to identify the subject for you and select the appropriate autofocus point.
It usually assumes that the subject is the nearest thing to the camera and close to the centre of the frame.
If there are objects between you and the subject or your target is off-centre it’s well worth finding out how to set the AF point yourself. And once you’ve done it a few times you’ll find it becomes second nature.
You’ll need to check your camera’s manual to find the correct mode, but it’s usually called something like Single-point or (conversely) Multi-point mode.
2. Freeze movement
If your subject is moving and you want to freeze it you need to set a fast shutter speed. The easiest way to do this is to set your camera to the ‘Sport’ scene mode, but if you want to take a bit more control, try using shutter priority (Tv or S) mode instead.
In shutter priority mode you set the shutter speed while the camera takes control of aperture to make sure that the image is correctly exposed. If you find that the camera won’t let set a shutter speed fast enough you need to increase the sensitivity (ISO) value.
You can make life easier by setting the camera’s sensitivity value to Auto and then you don’t need to worry about adjusting the value as the camera will take care of it.
3. Blur backgrounds
One of the great things about using a decent a camera rather than relying on a ‘phone to take pictures is that the larger sensor allows you more control over depth of field (the size of the sharp zone around the focus point). The primary control over depth of field is aperture.
A large aperture (small f/number such as f/4 or f/2.8) restricts depth of field to a small area in front of and behind the point of focus so the background is blurred.
The easiest way to control aperture is to use aperture priority (Av) mode. When this is selected you set the aperture and the camera takes care of shutter speed.
Watch out for the camera setting a slow shutter speed when light levels fall, as you could end up with blurred images. If necessary, push sensitivity up to enable faster shutter speeds or put the camera on a tripod to prevent it from moving.
You can restrict depth of field further by moving closer to your subject and/or using a longer focal length lens (or zooming in).
Also try moving your subject forward and away from the background as this increases the distance between the it and the point of focus and the area behind your subject becomes more blurred.
To read the original article you can visit Photography Corner
Source: Photography Corner